2019/02/28

How to Choose a Decent wiTech Micropod 2 China Clone?

What's the main difference of Micropod 2 china clones? Why do many go for SP271-C1?Look here: Micropod 2 good vs. bad china clone

 Micropod 2 High-quality China clone (SP271-C1)Micropod 2 Bad clone
Outlookmicropod2-hq-clone-1Original HQ connector can perfectly match with the obd port on the car. Made of special engineering plastics, it's resistant to common automotive chemicals and has high impact resistance.
Tin-plated metal tables ensure that the connector looks in place during use, providing complete error-free data transmission. It features unparalleled quality, reliability  and durability.

The outer casing is made with highly durable ABS plastic molded with integral clip fastening, and internally molded with plastic support for safe protection of the internal circuit board.
micropod2-bad-clone-1The bad china clones look rough, ungly.

Plastic for molded connectors is fragile. And easy to react with many common chemicals, with poor reliability and durability.
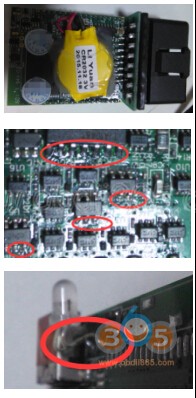
Inner partsmicropod2-hq-clone-2Taiwan MILL plate, excellent workmanship, quality and reliable all the original components consistent with the perfect one to one program

micropod2-bad-clone-2

micropod2-bad-clone-3

Rough work, welding rough, domestic components, some of the missing parts (illustration only part of the example)
Connection
micropod2-hq-clone-3
Customization USB cable
The high-quality wire ensures data transmission stability, accurate and reliable test results
 Same as ordinary USB cables in the market
Packagemicropod2-hq-clone-4Using anti-static packing, moisture, anti-static and anti-external electromagnetic interference. Protect the equipment from potential hazards. To ensure that customers receive a good and new tool. Ordinary carton
Softwaremicropod2-hq-clone-5The latest version: 17.04.27 witech
The software is sustainable synchronization updates, programmable, networkable, to ensure tests on the latest models.
 The bad clone only work with the version 14 and not able to update to the latest and cannot work with network connected.

Nonsense: The new version requires an account!
CANNOT do programming! Programming requires network connection, but the bad clone can not be used online.
Warranty Support replacement for non-human damage. It's not for the cover change, but a real change for a new circuit board. Unable to get a new one if yours is damaged for a non-human reason.

Micropod 2 hq vs. bad china clone:
micropod2-hq-vs-bad-clone-1

micropod2-hq-vs-bad-clone-2

Why do you buy Micropod 2 clone off obdii365.com:
micropod2-hq-clone-6

micropod2-hq-clone-7

micropod2-hq-clone-8


micropod2-hq-clone-9

micropod2-hq-clone-10


What you will get if you place an order at obdii365.com:
Micropod 2 of good quality and working witech to use with
micropod2-hq-clone-11

micropod2-hq-clone-12

micropod2-hq-clone-13

micropod2-hq-clone-14

micropod2-hq-clone-15

micropod2-hq-clone-16

micropod2-hq-clone-17

micropod2-hq-clone-18

micropod2-hq-clone-19


source:  http://www.obdii365.com/wholesale/witech-micropod-2-diagnostic-programming-tool.html

Software Version: V17.04.27
Update: Support continuous update synchronously, offer new version download link for update
Programming: Require a dealer account (we do not offer dealer account)
Able to work online: Can connect to internet online
Vehicles: Chrysler, Jeep, Dodge, Fiat
Languages: English, French, Spanish, German, Italian, Russian, Japanese, Korean, Chinese

Compared with Turkish version, Chinese version Micropod ii VCI Hightest:
  1. Sustainable synchronization updates, can be networked, can work online with server
  2. Original connector, perfect interface with car OBD
  3. Software Version: V17.04.27
  4. High-quality USB data cable, data transmission is stable and reliable
  5. Anti-static packaging, moisture, anti-static, anti-electromagnetic interference
  6. Within one year of non-human damage free replacement

Vehicle list:
For Chrysler, Jeep, Dodge, Fiat
Support For  chrysler and Fiat online programming.
(Note: Package with no fiat  software, Customers need have their own micro pod 2 fiat software so that can installation and programming
Newest Chrysler diagnostic equipment, can do diagnostic, programming (requires account number) and all other functions.

MADE BY MOPAR (CHRYSLER) and OEM, the microPOD II supports 100% of CAN Chrysler, Dodge, Jeep, and Fiat (North America), including 2014 Ram ProMaster, and 95% of non-CAN.

The wiTECH diagnostic system is designed to work on Chrysler, Dodge,  Jeep, and North American Fiat vehicles equipped with CAN BUS technology.  It provides the latest technology and significant hardware and software  performance enhancements over the current StarSCAN and StarMOBILE  tools. This tool provides cutting edge technology will enable  technicians to increase their productivity and provide world-class  diagnostic services to your customers.  This tool is very easy to use  .The MicroPod 2 is a great OEM dealer diagnostic tool that will give you  full access to the vehicles that you are working on. This tool is the  Next Generation Chrysler Scan Tool for “CAN” Bus Models and is a direct  replacement for wiTECH VCI POD

Vehicle Application:
Chrysler latest diagnostic interface fits in your shirt pocket and provides 100% CAN coverage for Chrysler, Dodge, Jeep, Fiat.
Although small in stature, this dongle-style device offers 100 percent  CAN coverage for Chrysler, Dodge, Jeep, and Fiat vehicle platforms. This  is the same diagnostic and programming tool the dealerships are using.  It replaces your StarMobile, StarScan, and wi-TECH POD, and enables your technicians to increase their productivity and provide world-class  diagnostic services to your customers

Features:
Supports all the latest technologies and vehicle platforms, including  the latest Chrysler and Fiat Vehicles and new 2014 Dodge Ram ProMaster  and 2015 Jeep Renegade
Works as a direct replacement for the wiTECH pod
Works with your currect wiTECH software
No smart cables required
No drivers needed

Requirements:
Laptop with Windows 7 32-bit operating system or later
Screen resolution of 1920x1080 or greater

Specifics:
* PC-Based: Requires PC connection
* Model Year Coverage: 100% CAN equipped vehicle coverage to current
* PC Recommended: AE Tools i7 Durabook Custom Laptop
* A separate Tech Authority  Subscription is required to access to Module Re-Flash Programming, TSBs, wiring diagrams, and repair information.
micropod2-hq-clone-20

www.obdii365.com

2019/02/12

Radio code Jeep grand Cherokee 2014 with Micropod2 Clone

Customer feedback today:
Radio code Jeep Grand Cherokee 2014, success.
I am using your wiTech Micropod2 clone interface.

Pictures attached:
micropod2-jeep-2014-radio-code-1

micropod2-jeep-2014-radio-code-2

micropod2-jeep-2014-radio-code-3

2019/01/23

How to reprogram Chrysler PCM witg DRB III?

Look here: Procedure in detail will be of interest to those contempating a PCM change
After reading this, it is obvious that PCMs can be reprogrammed.
I have flash DVD for the DRB III, hopefully I will get it and can then do programming on a “swap” system. Keeping my fingers crossed.
It is Chrysler’s new “policy”
Mopar® is currently phasing out pre-programmed PCMs for the vehicles listed. New
modules will no longer be pre-programmed when received from Mopar®. Replacement of
future PCMs will require programming utilizing the DRBIII and TechCONNECT. The PCM
will not operate the engine until it is programmed. A Diagnostic Trouble Code (DTC) will be
set – “not programmed”.
CAUTION: Extreme care must be taken when programming a calibration into a
generic PCM. Do not randomly select a calibration. Once a calibration is
selected and programmed, the controller cannot be reprogrammed to a
different calibration. The module can only be reprogrammed to a more
recent version of that calibration.
When flashing a 2002 – 2004 LH vehicle the BCM may need to be
disconnected if experiencing failures during the flash of the transmission
portion of the PCM. The BCM will need to be disconnected after the module
ID portion of the flash is complete. Before pressing Page Forward to begin
the flash of the PCM Turn the Key to the OFF position and disconnect the
BCM. Then turn the KEY to the RUN position and Press Page Forward to
begin the PCM flash session.
NOTE: If this flash process is interrupted/aborted, the flash should be restarted and
then follow the directions on the DRBIII emulator.
Step 1. Before beginning the reprogramming procedure, remove any old flash reprogramming
files from the DRBIII memory. To clear the memory from the MAIN MENU power up
the DRBIII and then:
a. Simultaneously press the “MORE” and “YES” keys.
b. A screen will appear requesting a “COLD BOOT”.
c. Follow the on screen instructions by selecting the “F4” key.
d. When the DRB III® reboots to the MAIN MENU, proceed to Step 2.
NOTE: If your vehicle is a 2002 LH and the original PCM part number begins with 04
the technician should use the 2002 LH Part Number Reference chart above to
determine the corresponding “NEW” part number. This new number from the
chart should then be entered into the Tech tools application as the orginal
part number. If the original PCM number begins with 05 no change to the
flash selection process is required.
Step 2. With the ignition switch in the “RUN” position, determine the original part number of the
PCM currently in the vehicle. Using the DRBIII select:
a. “DRBIII Standalone”
b. “1998 – 2004 Diagnostics”
c. “All (Except Below)”
d. “Engine”
e. “Module Display”
f. Record the first ten (10) characters of the “PCM part #” on the repair order for later
reference.
NOTE: If the PCM is not operational, the part number can be obtained from the label
on the old controller. If the label on the controller is not legible, proceed to
next step.
Step 3. Page back to the “Main Menu”
Step 4. Determine if the vehicle is equipped with SKIM. Using the DRB3 select:
a. “DRBIII Standalone”
b. “1998 – 2004 Diagnostics”
c. “All”
d. “System Monitor”
e. “J1850 Module Scan”
f. Look for “SKIM” in the list of modules.
Step 5. If the vehicle is not equipped with SKIM then proceed to step 6. If the vehicle is
equipped with SKIM obtain the vehicle Personal Identification Number (PIN) before
continuing with step 6. This information is available from one of the following:
a. The original selling invoice.
b. The DealerCONNECT system under the “Sales” or “Parts” tabs – select “Key
Codes”.
c. By contacting the DaimlerChrysler Customer Assistance Center (DCCAC) at
1-800-992-1997.
CAUTION: Failure to install the SKIM pin number into the module after flashing the
PCM will cause a start and stall condition.
Step 6. Replace the PCM using the appropriate generic control module. Refer to the service
information available in TechCONNECT or the appropriate service manual in Section
8E, Electronic Control Modules, Powertrain Control Module, Removal/Installation.
Step 7. Open the hood, install a battery charger and verify battery state is above 11.5 volts.
Step 8. If the old “PCM part #” is known, proceed to step 14. If the old “PCM part #” is not
known, proceed to next step.
Step 9. On DealerCONNECT select the “Service” tab.
Step 10. Select “Vehicle Information Plus”.
Step 11. Manually enter the VIN and mileage and select “Enter”.
Step 12. Select the “Vehicle Option” tab.
Step 13. Under the “Vehicle Option” window, identify and record:
a. Engine.
b. Emissions (Federal or California).
c. Transmission (Automatic, 5-speed manual, etc.).
Step 14. Connect the DRBIII to TechCONNECT and the vehicle. Open TechTOOLS and
verify that the “DRBIII Status: Connected” message is in the upper right corner of the
TechTOOLS screen.
Step 15. TechTOOLS should automatically populate the VIN in the “Vehicle Criteria” area and
the available updates. If not, manually enter the VIN then TechTOOLS will populate
the available updates.
NOTE: Do NOT enter the generic controller part number in step 16a below.
Step 16. Determine the proper calibration:
a. If the old “PCM part #” is known, enter the part number of the old controller in the
“Parts Criteria” p/n window. Proceed to step 16.
b. If the old “PCM part #” is not known, select the correct calibration based on the
information that was recorded from “Vehicle Options” in step 13.
Step 17. Select the correct calibration.
Step 18. Select the “Download/Update” button.
Step 19. Monitor the “Flash Download/Update Progress” window on the TechCONNECT and
follow the instructions on TechCONNECT/DRBIII. When the flash process is
completed, proceed to next step.
Step 20. Enter the VIN in the PCM. Using the DRBIII select:
a. “DRBIII Standalone”
b. “1998 – 2004 Diagnostics”
c. “All”
d. ”Engine”
e. “Miscellaneous”
f. “Check VIN”
g. If the vehicle is not equipped with SKIM proceed to step 20h. If the vehicle is
equipped with SKIM follow the directions on the DRBIII. When the VIN and SKIM
key has been programmed, proceed to step 20.
h. Enter the VIN as requested by the DRBIII.
Step 21. Update the PCM mileage. Using the DRBIII select:
a. “DRBIII Standalone”
b. “1998 – 2004 Diagnostics”
c. “All (Except Below)”
d. “Engine”
e. “Miscellaneous”
f. “Check PCM Odometer”
g. “NO”
h. Enter the current odometer mileage and then press “Enter”.
-9- 18-006-04 REV. B
i. Cycle the ignition key to the OFF position and back to the ON position and then
press “Enter”.
Step 22. Proceed as follows:
a. If the vehicle is equipped with an automatic transmission, proceed to step 24.
b. If the vehicle is equipped with a non-turbo engine and manual transmission, it is not
necessary to set the pinion factor. Proceed to step 24.
c. If the vehicle is equipped with a Turbo engine and manual transmission, proceed to
step 23.
Step 23. On vehicles equipped with a Turbo engine and manual transmission, set the Pinion
Factor. Using the DRB III select:
a. “DRBIII Standalone”
b. “1998 – 2004 Diagnostics”
c. “All (Except Below)”
d. “Engine”
e. “Miscellaneous”
f. “Pinion Factor”
g. Select the correct tire size and then select “Page Back” to exit.
h. Proceed to step 24.
Step 24. On vehicles equipped with an automatic transmission, set the Pinion Factor. Using the
DRBIII select:
a. “DRBIII Standalone”
b. “1998 – 2004 Diagnostics”
c. “All (Except Below)”
d. “Transmission”
e. “Transmission Module”
f. “Miscellaneous”
g. “Pinion Factor”
h. Select the correct tire size and then select “Page Back” to exit.
i. Enter “Quick Learn” and then follow the instructions on the DRBIII.
NOTE: Due to the PCM programming procedure, a DTC may be set in other modules
(TCM, BCM, MIC, SKIM, etc.) within the vehicle, if so equipped. Some DTC’s
may cause the MIL to illuminate. Check all modules using “Module Scan”,
record the DTC’s, and erase these DTC’s prior to returning the vehicle to the
customer. Erase any DTC’s in the PCM only after all other modules have had
their DTC’s erased.
NOTE: The following step is required by law.
Step 25. Type the necessary information on the “Authorized Modification Label” p/n
04275086AB and attach near the VECI label (Fig. 1).


You have to know: esp. for newbies

You’d better take a VCI Pod for use with DRB iii, NOT the clone Micropod 2 (even the high quality SP271-C1 cannot work good with DRB emulator. ) look here: http://blog.obdii365.com/2019/01/16/drb3-emulator-worked-with-micropod-2-or-vci-pod/ tested on 300M. VCI Pod says yes but Micropod2 clone cannot work….

2019/01/22

DRB III Review on Chrysler 300M ABS Bleeding

Here’s something good i found when i bled ABD for my 300M. Very useful…. Hope it works for you guys also.

Complaints i posted in https://300mclub.org/forums/:

I noticed something with my car that I wanted to comment on since “testing” my ABS for the first time this season. After arriving to school just in time for a final I put my foot down hard on the brake while pulling into the gravel lot, which was frozen over just like a skating rink. As I fully anticipated the ABS came on and was effective. However, once I came to a complete stop the pedal went soft and I had to pump it 6 or 7 times before it firmed back up (no jokes please). I have noticed my brake pedal is a little softer than most other LH cars I have driven but I have never noticed variance like this after ABS braking. I am very familiar with braking using ABS in my car and I think this is something abnormal.

Tips I got from user97:
Did the fluid level drop — if it did, then you probably got a leak somewhere and air in the system.

If the fluid level is OK but pedal is softer after ABS engagement, there is a possibility that a valve in the ABS system did not close fully.

In order to provide anti-lock capability, ABS unit has the ability to isolate any wheel from the M/C pressure as well as relieve the pressure into a temporary storage (accumulator). The ABS pump then pumps the excess fluid back into the M/C (hence pedal pulsing).

There is a possibility that the valve on one wheel has not completely closed and allows bleeding into the “accumulator”. As ABS system is not engaged, the pump will not start to empty the accumulator. So you are basically compressing the accumulator spring before any significant brake action on that circuit would commence. Accumulator has a rather small volume, so it would reach capacity pretty quickly. I noticed that there is a significant amount of rust that builds up in the brake fluid as the lines rust from inside due to moisture accumulation. May be a flake of rust got stuck in the valve and provides a miniscule leak into accumulator. ABS monitors state of the valves — anything significant would trigger an ABS fault.

It might be something else, like M/C leaking internally past pistons. But on the off chance, I would exercise ABS a few more times. Valve action would most likely cure the issue if it is the problem.

Search on Youtube and there is some video that illustrates ABS HCU operation
(AFAIK, on our cars ABS controls rear wheels independently rather than as a pair).

Playing with DRB III, you discover how potent ABS system is. When running ABS HCU test, it instructs you to apply pressure to the brake (with engine off/booster bled). Then ABS valves open up, filling up accumulators. It is very impressive — pedal falls to the floor without any resistance. As the next stage of the test, it closes the valves and turns on the pump, which literally pumps the pedal back to the original state. While I knew how ABS worked in general terms, I never realized the degree to which ABS could potentially interfere with normal brake system. No wonder, the unit is designed to be so fail safe, as to prevent such failures (turns itself off at the slightest sign of trouble).

Normally, there should be no need to bleed ABS, as long as MC was never run dry, you should be OK. I would be careful about sucking fluid out of MC — a little is OK, just make sure that neither half gets empty to prevent air injection.

On a side note, for DRB iii, you’d better use VCI Pod, NOT the clone Micropod 2 (even the high quality SP271-C1 cannot work good with DRB emulator. ) look here: http://blog.obdii365.com/2019/01/16/drb3-emulator-worked-with-micropod-2-or-vci-pod/ tested on 300M. VCI Pod says yes but Micropod2 clone cannot work….
witech-v17-review

2019/01/20

Program Dodge used ECM with wiTech Micropod2 clone

Witech Micropod II new test report from obdii365.com customer. 

 Amazing. I received the device in record time. I was nervous if this device will work to program an used ECM that I replaced from another Dodge to my Dodge. Purchased a subscription at Tech Authority, and this device showed that the ECM/TCM had new flash to be upgrade. At the beginning I had an error on my PC that this device did not support my car with the latest version 17.0.4 (something like that). I did uninstall the new software and installed the old 17.0.3 and worked. I did flash and reprogram with no issue at all, and bang the Dodge came alive with no problem. This device works like a charm.
Thank you again.  

2019/01/16

MicroPOD II and VCI Pod: Which is better for DRB3 Emulator?

Discussion: DRB3 compatibility with MicroPOD II and VCI Pod. 

Car: 2004 Chrysler 300M
Software: DRB3
Firmware: wiTech MicroPOD 2 and VCI Pod

It is said that the MicroPOD II can run the enhanced DRB III emulator with WiTech App v16.04.12. However this app version might require to run online, connected to TechAuthority. If it does you’re screwed because it will be banned based on its ID.

I have a Micropod II V17.04.27 Type C…. But I can not use it, because it can not find the ECU. can only display battery voltage. I can only select cars between 2017 and 2004. I have a 2004 300M, but no chance. I think only real CANbus can be used.
the extended DRBIII Emulator can not work, it needs an update, but this would make the adapter useless I think.

So, I think, only witech VCI Pod can help.

This is what I’ve tested:
Alarm: tried to force activation but I’m missing a sensor in the trunk, so it won’t activate.
EVIC/ATC: screens autodiagnostics
Memory seats: enabled the glide feature (easy exit) on a 1999 and 2000 Ms!
ECU tests: Fuel injector #1 (it fires the fuel pump and opens the injector, I guess you need to have the injector off the car to really see what’s going on).
BCM tests: Lights tests (it flashes all lights or a specific one you choose so you can see if the bulb/wiring/bcm are ok).
TCM tests: I don’t remember but I think the engine has to be running for the tests to complete (you are supposed to look at the RPMs while the TCM triggers the solenoids).
RKE: tested the keys (it tells you which button is pressed on the fob)
And there are so much values you can read… Basically you can read all sensors of course, but you can get the interior light dimmer switch output, sun sensor value, heated seats temperature IIRC… It’s a great tool but IMO it doesn’t worth that much considering you cannot flash modules.

Flashing was a failure for the TCM. However it looks like I could flash the EVIC if a flash was available. I used a flash for another model, made some changes to the flash file descriptor (basically it’s an XML file describing the flash, what part number it replaces, what old part numbers are flashable, etc…) but I didn’t press the button as it would have break the EVIC.

Fyi, flash files are available from TechAuthority website but you need a subscription. A 1 or 3 days subscription is enough. The flash application packaged with WiTech software 13.x is old, so you should use the one from TechAuthority. The thing is, it also downloads a newer driver and WiTech server program, and they won’t work with WiTech 13.x or 14.x. For this reason I used my corporate laptop and/or a virtual machine, dedicated to the flashing app.
Once you have selected a flash on TechAuthority website, it downloads a few files in your computer temporary folder. You can save these files (basically I copy-pasted the files in a new folder named after the flash part number) and reuse them latter. That way, you don’t need the TechAuthority subscription anymore. It should also work for real DRBIII devices. Simply copy-paste the files from where you saved them to your temp folder. IIRC you have to start the flash application once to get the required subfolders created in the temp folder.
With the 13.x software version, from the DRBIII emulator, you can run the non-powertrain flash application. And this flash app was able to read the part number from the EVIC on the car, while the powertrain flash app (and also the flash app from TechAuthority) could not read the part number from the TCM. That’s why I’m guessing I should be able to flash the EVIC. Also I talked with a guy on YouTube who was able to flash the EVIC on his Jeep (2002 IIRC).
For most tests, I had the engine not running, key in RUN position.
Want a good reason? lol!
That’s exactly why I waited so long… Well you can talk to the ABS module and read the codes, which is not possible on the 300M with a cheap ELM327! You can run the ABS bleeding procedure (not tested yet), read the Clutch Volume Indexes from the transmission, pair a new PCM/BCM/SKIMM module (not tested)…
I wouldn’t get the newer dongles, they run a bit cheaper on AliExpress but I’ve read they don’t work with the TechAuthority web components, which is the all point of having the new device over the VCI Pod. So don’t buy one!

On a side note, DRB3 and VCI Pod setup instruction I’m using: http://blog.obdii365.com/2017/08/17/review-drb3-emulator-witech-vci-pod-clone/

2019/01/01

What is best for all Chrysler (-2018): MicroPod 2? CDA?

This is for those looking for a decent tool works on and flashes all Chrysler vehicles the same level as dealer technician can.

Purpose: Want to have full “dealer level” capability for all Chrysler – Hemi / Cummins / body modules, Ecodiesel, Pentastar 3.6, everything Chrysler / Ram like we do on GM and Ford

Tools used: have Cardaq J2534 device, have used the J2534 program for flashing in the past as well as the J2534 Drewtech toolbox for some skim and vin updates
Issues: Have a few big name scan tools we are able to do a lot of functions but just always end up something we can’t do
For example: 2014 Ram 1500 air suspension, unable to perform the system recharge function for the air ride, although our tools have the bag fill, system test, etc, missing the one function and have to send it to dealer.
Budget: Not afraid of paying for the right stuff, but afraid of paying for less than i need or having issues.
My ideas of devices:
WiTech VCI Pod
WiTech Micropod II
DRB
DRB Emulator
CDA
StarScan
pre-2004 not worried about, generic scan tools work well enough for most things
2004-2012 – have good coverage but run into things not able to perform, for instance can do the Quick Learn on RFE transmissions but cannot do the DRIVE LEARN, Drewtech advises against reflashing modules with J2534 software as high failure rate,
2013-up this is where our coverage gets a lot more spotty  – have a lot of WIN modules we replace but have been able to program them with one of our aftermarket tools but only up to 2012, functions like VGT turbocharger relearn, NOX resets, etc
Examples of things had to send to dealer:
2014 Ram 1500 BCM replacement and reflash
2017 Ram 3500 WIN module replacement, push start
2014 Ram 1500 air suspension system recharge
2014 Durango hemi ecm replacement, unable to configure new ecm (probably could have with ecm unlock and hp or something but this was just to flash stock)

Tips and guides:
for 2017 and older:
you can use micropod clone+witech1 (online/offline).(witech activator can help with not registered error)
micropod tests on a 2015 vehicle:
you should use micropod 2 original/hq clone +witech2(online)
micropod tests on a 2018 vehicle:
you should have a Dealer Connect account.
for very specific operations:
you should have CDA 5.13/5.14 (for 2010 and older) and CDA 6 for 2011 and newer.

This is for your information.

Micropod 2 clone (item no. Sp271-c1) is the best
The best quality and cost-effective
Work as good as the original, including basic obd2 diagnostic tests and programming:
1) It can be used as diagnostic and programming tool by the dealerships. Replaces your StarMobile, StarScan, and wi-TECH POD,provides world-class diagnostic services to your customers.
2) A separate Tech Authority  Subscription is required to access to Module Re-Flash Programming, TSBs, wiring diagrams, and repair information.

Confirmed to work with DRB3 application

Test reports on vehicles 1997-2018: