2020/08/02

Possible to use Witech to write vins on a 2015+ Dodge?

Purpose: to perform a PCM replaced procedure to learn/synch the skim / write vins on a 2015+ Dodge.

Question:
I have a good quality micropod II clone registered for online use with Witech 17. Is this possible? If yes, how?
My micropod clone has firmware version 2.4 and is registered so works with witech 17.04 software and tech authority online.


Suggestion:
if you can use your clone micropod 2 while witech software is online, yes you can perform “restore vehicle configuration” and program the car mileage into the pcm.
you need online account for this of course.. But sellers does not provide online account. 

Test reports for sharing:
Did not work… “0x42 unable to write vin, retry restore procedure”.


What to do next?
  1. Do you have any launch scanner tool? easydiag will do the pcm vin and miles change.
    as for the skeem learn for a used pcm is not needed as long the vin on the pcm matches the rest of the modules in the car, should work fine.

  1. Also it is possible to write VIN into Dodge PCM using Launch X431 Diagun IV (discontinued and replaced by X431 Diagun V).

Car model: 2002 Dodge Ram Van 1500
1). Click PCM module
diagun-v-write-vin-to-dodge-1
2). Special function
diagun-v-write-vin-to-dodge-2

3). Check PCM Vin
diagun-v-write-vin-to-dodge-3

4).writing Vin
diagun-v-write-vin-to-dodge-4

5).New Vin
diagun-v-write-vin-to-dodge-5

6).Vehicle Vin is Valid,successful!
diagun-v-write-vin-to-dodge-6

  1. Also Autel tools has the ability to write the VIN into Dodge.
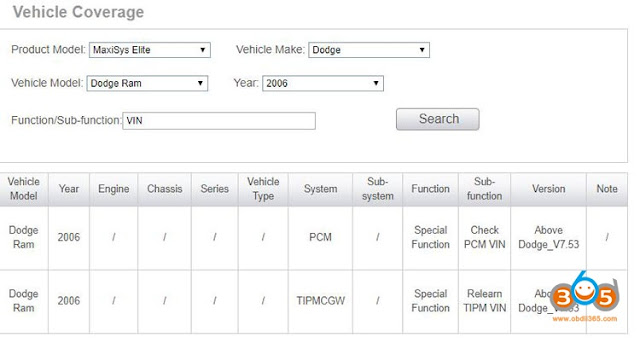
the Autel MaxiSys tools (i.e Maxisys Elite) do have the ability to write VIN. Specific function availability will varies by year and model.
Here is an example of the VIN writing options for a 2006 Dodge Ram.
autel-maxisys-write-vin-to-dodge-1

The “Check VIN” function works the same as other scan tools, if there is no VIN in the PCM it will then allow you to write the VIN number to the module.

Details for the Autel Maxisys coverage are available on this page:
autel-maxisys-write-vin-to-dodge-1

1 – Select the Autel Tool from the list (i.e. MS906, Elite, Mx808, etc.)

2 – Select a Vehicle Manufacturer

3- Select a Vehicle Model

4- Select the Vehicle Year

5- Click Search

Coverage will be listed in an undetermined order, grouped by System. (ABS/Engine/Airbag)
You can use the Function box to narrow the search.

2020/07/16

How to Program Chrylser RKE with DRB III Scan Tool?

All  you need to do is program old fob (RKE) to the replacement CTM using DRB-III after get a CTM replaced. This is confirmed using an official DRB-III emulator and WiTech VCI pod.
Programming the RKE (Remote Keyless Entry) transmitter access codes requires the use of a DRB III scan tool, so if you need to replace one or want a spare you’ll need to visit your local dealer to have this done.

programming methods A thru D. Only Methods A thru C are applicable to Jeep vehicles and only from 1999 to 2002. Methods A & B are Customer Programing Methods that can be found elsewhere on other websites. Method C is a Dealer Programming Method that requires the use of a DRB III scanning tool.

SUBJECT:
Remote Keyless Entry (RKE) Programming Procedures
MODELS:
1999 – 2002 (AB) Ram Van/Wagon
1999 – 2002 (AN) Dakota
1999 – 2002 (BR/BE)Ram Pickup
1999 – 2002 (DN) Durango
2002 (DR) Ram Pickup
2001 – 2002 (JR) Sebring Sedan/Stratus Sedan/Sebring Convertible
2002 (KJ) Liberty
1999 – 2002 (LH) Concorde/Inytrepid/LHS/300M
1999 – 2000 (NS) Town & Country/Caravan/Voyager
1999 – 2002 (PL) Neon
1999 – 2002 (PR) Prowler
2001 – 2002 (PT) PT Cruiser
2001 – 2002 (RS) Town & Country/Caravan/Voyager
1999 – 2002 (WJ) Grand Cherokee
1999 – 2001 (XJ) Cherokee

NOTE: PLEASE READ INSTRUCTIONS FULLY BEFORE ATTEMPTING TO PROGRAM TRANSMITTERS.
Program Method A (Customer Program Method)
1. Press (LOCK) button 5 times at 2 second intervals to resynchronize transmitter. Attempt to function transmitter, if working as designed discontinue programming.
2. Turn ignition to run position. (Allow ignition chimes to stop).
3. Using any original (working) transmitter, press the [UNLOCK] button for 4 to 10 seconds.
4. Within the specified 4 to 10 seconds, continue pressing the [UNLOCK] button and press the [PANIC] button for 1 second and release both buttons (AN/DN release
either button first). A chime will sound to indicate that the transmitter programming mode has been entered (allow 3 seconds for chime to sound).
5. Press [LOCK] and [UNLOCK] buttons simultaneously for 1 second and release (a short chime will sound for AN/DN).
6. Press and release any button on the same transmitter and a chime will sound after successfully programming the transmitter (locks will cycle for AN/DN).
NOTE: (FOR DR 0NLY ) A CHIME WILL NOT SOUND ON STEP #6 FOR THE FIRST TRANSMITTER PROGRAMMED, BUT WILL SOUND UPON PROGRAMMING THE SECOND TRANSMITTER.
7. Repeat steps 5 through 6 to program additional transmitters.
8. Turn ignition to OFF position. Transmitter programming mode will discontinue after 60 seconds (30 seconds for AN/DN and RS). (All transmitter programming must be completed within time specified).

Program Method B (Customer Program Method)
1. Press [LOCK] button 5 times at 2 second intervals to resynchronize transmitter. Attempt to function transmitter, if working as designed discontinue programming.
2. Turn ignition to the run position (Allow ignition chimes to stop).
3. Using original transmitter, press and hold the [UNLOCK] button on the transmitter for between 4 and 10 seconds.
4. Continue to hold the [UNLOCK] button and press the [PANIC] button. A chime will sound to indicate that the transmitter programming mode has been entered (Allow 3 seconds for chime to sound).
5. Press a button on all transmitters to be programmed into the system including any previously programmed transmitters; a chime will sound when each transmitter has been programmed.
6. Turn the ignition to OFF position to exit the transmitter programming mode.

Program Method C (Dealer Program Method) *Can be used for any type transmitter.
1. Press [LOCK] button 5 times at 2 second intervals to resynchronize transmitter. Attempt to function transmitter, if working as designed discontinue programming.
2. Turn ignition to the run position (Allow ignition chimes to stop).
3. Plug DRB III to vehicle’s 16–way data link connector.
4. Follow Service Manual and DRB3 instructions to program transmitters.

Program Method D (For use with AB vehicles not equipped with VTSS only)
1. Locate the dark green program enable wire connected to pin #1 of the 16-way data link connector under the left side of the instrument panel.
2. Connect the program enable wire terminal to a good ground.
3. Insert the key into the ignition and turn the ignition switch to the ON position. The power locks will cycle (Lock and Unlock) indicating that program mode has been entered.
4. Using the transmitter to be programmed, press either [LOCK] or [UNLOCK]. The power locks will cycle indicating the transmitter has been programmed successfully.
5. Repeat step 4 to program additional transmitter.
6. Disconnect the program enable wire from ground to exit program mode.
7. Turn the ignition to the OFF position and remove the key.
NOTE: REFER TO DAIMLERCHRYSLER MDS2 SYSTEM OR PARTS DEPARTMENT TO OBTAIN THE CORRECT PART NUMBER AND REVISION FOR SPECIFIED VEHICLE.

Example: Programming new RKE  remotes/FOBs for the Jeep Cherokee XJ
Just for sharing purpose. Credit to http://colorado4wheel.com.
This is a “how-to” reprogram the RKE (Remote Keyless Entry) remotes/FOBs in the Jeep Cherokee XJ. This procedure is the same for 1997-2001 Cherokees, 1997/1998 Cherokees use a different remote than the 99-01 Cherokee that seems to interchange with all 97-01 Cherokee’s. 1996 and older Cherokees have a different programming procedure for the IR remotes. In theory it would be possible to swap in a programmed pair of remote and board to a 1996 and older for the improved remote range.
From the main menu, select #1, DRBIII standalone.
drb-iii-program-chrysler-rke-1
Select #1, 1998-2007 Diagnostics.
drb-iii-program-chrysler-rke-2
Select #1, All.
drb-iii-program-chrysler-rke-3
Select #7, Theft Alarm.
drb-iii-program-chrysler-rke-4
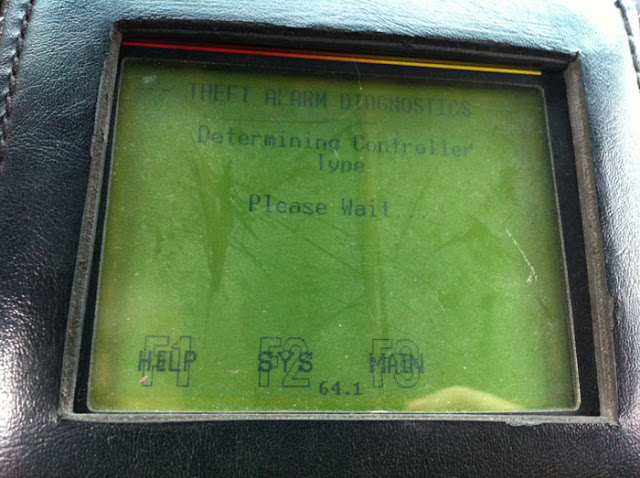
Select #1, VTSS.
drb-iii-program-chrysler-rke-5
Detecting.
drb-iii-program-chrysler-rke-6
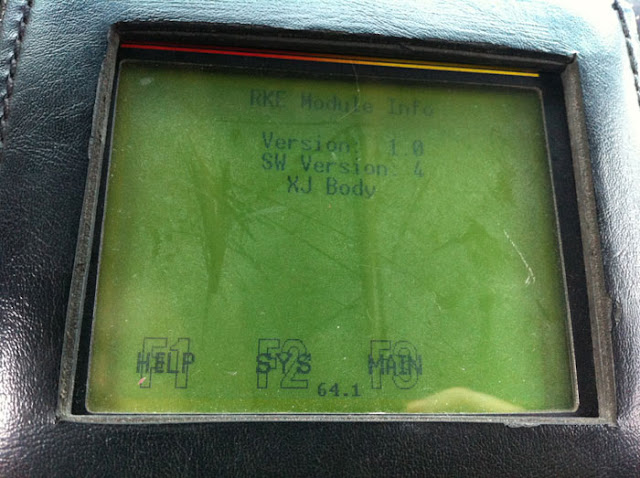
This will display after first detection.
drb-iii-program-chrysler-rke-7
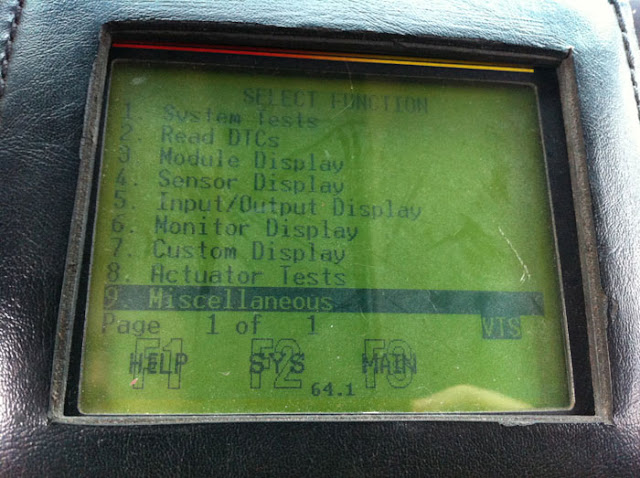
Select #9, Miscellaneous.
drb-iii-program-chrysler-rke-8
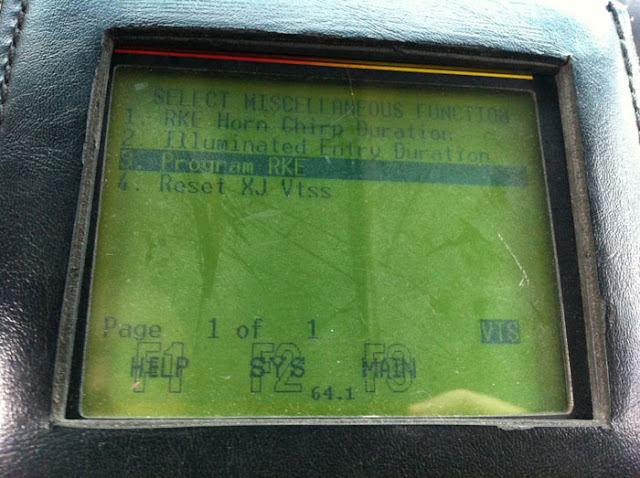
Select #3, Program RKE.
drb-iii-program-chrysler-rke-9
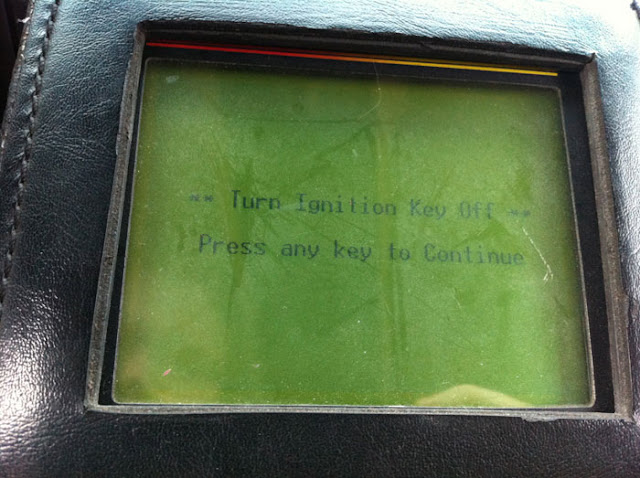
If the ignition is not off, turn it off.
drb-iii-program-chrysler-rke-10
Select which position remote you want to program for. Defaults are 1 and 2, Recommend having all the remotes available for programming, otherwise another remote might get overwritten.
drb-iii-program-chrysler-rke-11
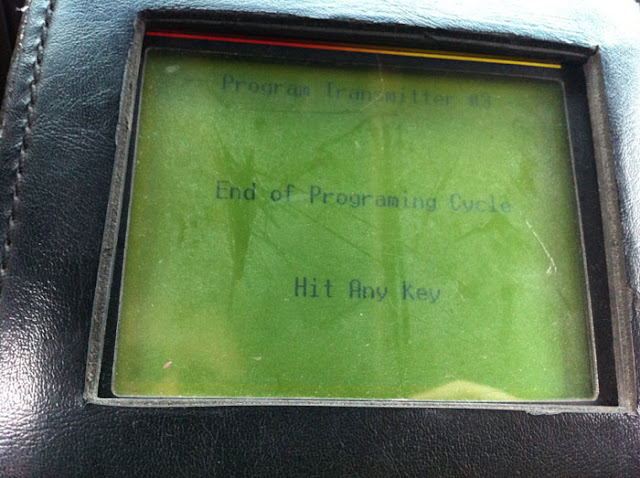
The RKE will accept a signal for a few seconds, press unlock repeatedly during this time. After the end of the cycle this will display, even if the programming was not successful. Test the remote by pressing lock and unlock, if it does not activate then it is not working properly and either needs to be programmed again or it is a bad remote.
drb-iii-program-chrysler-rke-12
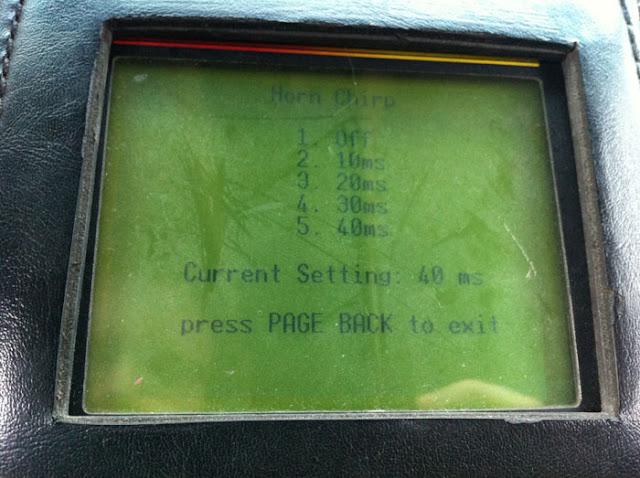
Select 1 to change the horn chirp duration.
drb-iii-program-chrysler-rke-13
10ms is almost inaudible, 40ms is very noticeable. User preference.
drb-iii-program-chrysler-rke-14
Illuminated entry can also be set. User preference.
drb-iii-program-chrysler-rke-15
While many remotes appear to be physically identical actual compatibility varies. Verify part numbers before purchasing remotes.
2020/07/09

VCI Pod + DRB III for Chrysler Grand Voyager 2006 2.8 CRD

Question: which diagnostic software for Chrysler Grand Voyager 2006 2.8 CRD?

Tested:
It looks like the 2006 voyager is covered by the DRB III. You can download a copy of witech with the DRB III emulator built in. You will need a scan tool compatible with witech though.

Here is free download witech v13.03 with the DRB III emulator built in:
Password: se5vcw
Contributor: obdii365.com engineer.

Witech v13.03 is compatible with the wiTech VCI Pod Kit:

11 steps to install DRB3 emulator on win7 / win10:

Why VCI Pod Kit instead of wiTech MicroPod2?
WiTECH VCI Pod:
Built-in DRB III emulator, more stable;
Wins in online and offline programming etc.

Buy additional DRB III emulator, and sometimes works sometimes does not work;
Wins in key programming.

What more Chrysler cars will be covered by the DRB III / wiPOD/ StarMOBILE / StarSCAN?
Please look at the following 3 images:
witech-chrysler-vehicle-list-1

witech-chrysler-vehicle-list-2

witech-chrysler-vehicle-list-3
Good luck!

2020/06/21

Will wiTech do ECU Coding for Chrysler Pacifica 2016 2017?

Recommend the good ecu coding tool for Chrysler Pacifica 2016 2017 (come with bcm coding).

Option 1.  micropod2 with subscription

Option 2.  If cars are not superior at 2017 you can simply download WiTech software from here and buy a Clone micropod 2
Witech 17.03.10 software free download here:
Running more stable than the newest witech 17.04.27.

As for the Witech 17.03.10 installation and activation, you can watch this video
(Network connection needed.
First connect MicroPod II to vehicle, if the red indicator turns on, then connect it to laptop and run software.)

This would be the only way I can think of outside of a witech 2 subscription that you would: be able to access the BCM, download flash files for it and flash it, then access the auburn hills FCA servers to “restore vehicle configuration” when you were done. 

witech-micropod-ii

Enjoy!

2020/06/05

How to use wiTech to Flash Chrysler Heated Seat Module (HSM)?

SYMPTOM/CONDITION:
The heated steering wheel shuts off to soon, usually after 30 seconds and does not achieve satisfactory temperature. This is an intermittent condition and more noticeable at temps below 19.5°C (67.1°F).

MODELS:
2015(WK)Jeep Grand Cherokee
2015(W3)Jeep Grand Cherokee (Egypt)
2016(KL)Jeep Cherokee
2015(WD)Dodge Durango
2016(LA)Dodge Challenger
2016(LD)Dodge Charger
2016(LX)Chrysler 300
2016(UF)Chrysler 200
Applies to these vehicles equipped with Heated Steering Wheel (Sales Codes NHS).


SUBJECT:
Flash/Program: Heated Steering Wheel Temperature
Updating the Comfort Seat and Wheel Module (CSWM) software for the KL/UF vehicles or the Heated Seat Module (HSM) software for the W3/WK/WD/LD/LA & LX vehicles.

DIAGNOSTIC TOOL:
The wiTech software is required to perform this procedure.


DIAGNOSIS:
Using a wiTech scan tool (micropod2 or vci pod) diagnostic application for flashing and ECU is available by selection “Help”, then “Help Contents” at the top of the wiTech Window.
The wiTech software is required to perform this procedure.


Programming Procedure:
Installation of parts:
The following operation must be carried out before programming: 
• Replacement of the steering column control unit (SCCM)
• Replacement of the climate control control unit
• Replacement of the steering wheel
• Installation / replacement of the heating control unit and the cable set under the seat
• Laying the cable from connector C200 to connector C376 and possibly also C376 for TIPM 
Programming as with the other internals is not necessary per se . The steering wheel heater should work immediately if the cabling is correct. During the first test, make sure that, like the seat heating, it only comes on when the engine is running. 
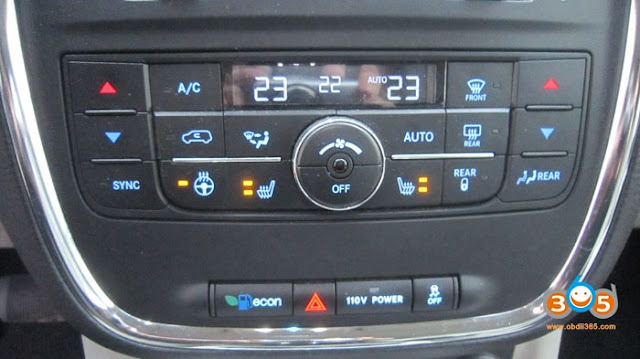
After the engine started, it was a good sign that the LED in the symbol of the steering wheel heater went on. The front seat heating could also be activated. After a short time you noticed the heating of the steering wheel.
witech-program-chrysler-hsm-1
Nevertheless, you have to check or have a setting checked afterwards to avoid possible damage to the steering wheel due to overheating. 
There is a configuration in the HSM module that differentiates between leather and wood steering wheels. If you do not know the origin of a used HSM module, a misconfiguration can occur if, for example, a wooden steering wheel is configured there, but it is no longer installed. 
The configuration can be changed or checked with the Witech. To do this, go to the wiTech HSM module and call up the “Heated steering wheel configuration” routine in the “Various functions” tab. 
witech-program-chrysler-hsm-2
First, the meaning of the routine is explained again.
witech-program-chrysler-hsm-3
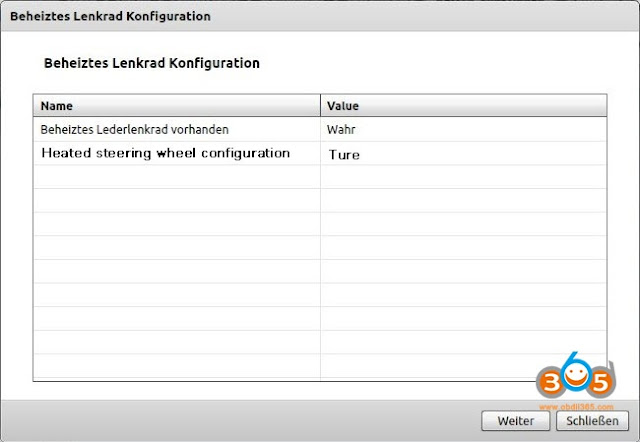
The current configuration is then displayed. In the picture, the wooden steering wheel is configured because the value for “Heated leather steering wheel available” was set to “Wrong”. 
witech-program-chrysler-hsm-4
If you click on the “Next” button in the following window, the configuration changes to full leather. If you have a wooden steering wheel, then click on “Close” in this window. Since I had installed a leather steering wheel, I clicked “Next”. 
witech-program-chrysler-hsm-5
Then you can start the routine for checking again. Now “True” stood for the value “Heated leather steering wheel available”.
witech-program-chrysler-hsm-6
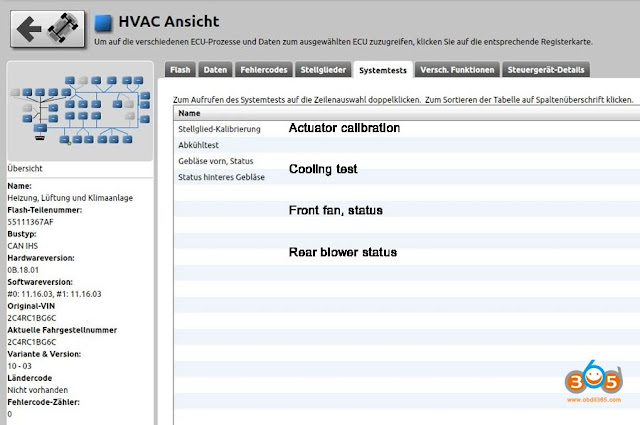
Another system test is also recommended. Since the air conditioning control unit has been replaced, you should go to the HVAC module. The “Actuator calibration” routine must be carried out there in the “System tests” tab. This makes sense because the start and end values ​​of the stepper motors of all flaps are stored in the air conditioning control unit. Otherwise it could happen that the flaps no longer close completely.
witech-program-chrysler-hsm-7
Done.

2020/04/16

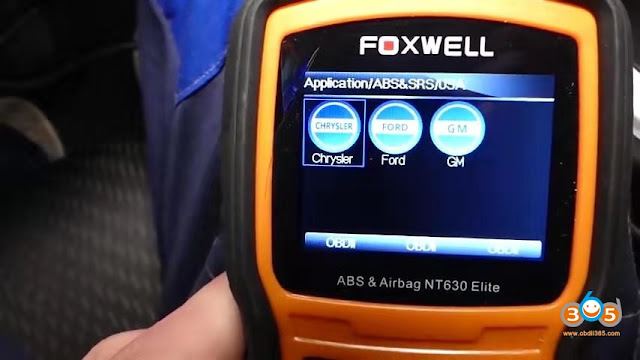
Witech Micropod2 vs. Foxwell NT530 Chrysler Scanner

Q: since my Chrysler has tackled the MIL, I would like to buy a diagnostic tool. Which hardware is good and cheap?  I am considering the Foxwell and wiTech scan tool.


Foxwell NT520/NT530 Review on Chrysler:
foxwell-chrysler
1)
I have now also bought this brand new diagnostic tool (Foxwell NT530 Pro with free Chrysler software):
http://www.obdii365.com/wholesale/foxwell-nt530-full-system-obd2-scanner.html
You order the tool and gets a manufacturer brand (here for example Fiat – includes: Fiat, Alfa, Abarth, Lancia) for free. It can add up to five car brands overall.
This costs about 55 to 60 euros per car manufacturer . So this is really a very versatile diagnostic tool for a fairly cheap money. The standard diagnostic language is English. A German representation is also possible, simply by the seller mentioned above.
Provide the real serial number of the Foxwell diagnostic device.
I compared that with the much more expensive Witech VCI Pod combination and as it looks at first impression the Foxwell can do exactly the same thing.
Also very interesting for youngtimer freaks: With a special additional adapter from Foxwell, it can also be used to service the old Daimler Benz vehicles with the 38-pin round connector (up to around 2000)
I successfully applied it to my son’s Mercedes CLK 230 (W208).
The diagnostic tool or the required manufacturer software can also always be updated free of charge.
If you have to process several brands, you are well advised with such a multi-brand device.  Foxwell tool is small and handy and can be quickly connected for diagnosis and data display and I like that very much. You can have that on your vacation trip without having to bring a laptop with you.

2)
The foxwell NT520 is a good tool so far with my limited use. 200 bucks and you get two “brands”. I picked BMW and Chrysler, and they work well for reading codes in other ECU’s that you can’t view with a standard bluetooth dongle and generic software. I recommend you look at their site to see what it will do for your Fords.


The Good:
  • Compatible with Multi-brand software
  • Hand-held, no need drag a laptop.
  • Lifetime updates on the Foxwell is a huge bonus
  • more suitable or intended for ordinary people / amateurs, hobbyists


The Bad:
  • Software update takes about an hour
  • A bit limited to old Chrysler (i.e  ZERO coverage on the 1997 Dodge Ram; can not read the 2002 Chrysler section Powertrain, ECM;  2006 Crossfire not able to communicate with Powertrain/ECM, TPMS etc modules )
  • Requests a CCD connector for 1996-2003 Chrysler vehicles but there is NO information regarding their CCD connector
  • It has many Chrysler features that are not part of the Jeep tests and if you select them the unit either takes a long time to tell you its not supported or it locks up
  • Foxwell may be a little slower when scanning modules (comparing Autel handheld scanner)


Foxwell Chrysler/Jeep/Dodge Vehicle coverage:
Durango
Charger
Magnum
Dakota
Grand Cherokee
Cherokee
Ram
Liberty
PT Cruiser
Commander
Pacifica
Aspen
Wrangler
Sebring
200
300
500
Dart
Avenger
Nitro
Compass
Raider
Caliber
Sprinter
Commander
Crossfire
Journey
Challenger
Mini Van
Town & Country Caravan
Viper
Routan
Freemont
Renegade
ProMaster


Review on wiTech Micropod II:
witech-micropod2
1)
With Witech can perform service, but no coding or activation of ECUs. Witech also can program new keys. It can replace the modules PCM, PEM, WIN or WCM.
It allows me to:
-disable seatbelt chime
-enable srt performance screens on radio and gauge cluster
-adjust default suspension ride height
-disable DRL’s
-change light settings for every light output…for example if you put on an SRT bumper and the DRL’s are now under the headlamps, you can set that up
There’s a lot more but I can’t remember off the top of my head.

2)
The micropd II is the cheapest option to carry out diagnostics on the vehicle using the same means as the FCA workshop. If you want more, i.e. add equipment or, for example, want to change heating parameters, you have to buy the more expensive VCI Pod.

3)
I purchased this Micropod II emulator (about $135). V17.04.27 wiTech MicroPod 2 for Chrysler Diagnosis & Programming Tool Multi-language
I have used it to perform a relearn sequence for the TPMS sensors, after they were replaced. It worked well for this.
A whole sequence of software patches need to take place in a precise order to make the DRB III emulator work with the Micropod II.  Once these software patches are installed, the unit seems to work well as a DRB III emulator. I was able to find the software and instructions online at no additional cost. I can say that the DRB III emulator is easy to use and worked great to perform a relearn sequence of the TPMS for my 2005 SRT6. I also used an Autel TS601 to make each wheel sensor “chirp” in the sequence requested by the DRB III.

4)
The witech ( and clones) micro pod 2 is capable of flashing the bcm (with the appropriate subscription to tech authority).

5)
All Crossfires 2004 to 2006 require DRB III with Crossfire multiplexer.  For Chrysler dealers the DRB III was replaced by the Starmobile unit. That was replaced by the Starscan unit. That was replaced by the Witech VCI pod. That was replaced by the Witech micropod, then the micropod 2. The current version of the Witech Micropod 2 is only the wireless version. The Witech software can be upgraded with enhanced DRB emulation.

*Lots of witech reviews are available on our blog. Use “search” button.


The Good:
  • Cheap
  • Chrysler Specific scan tool provides dealer level diagnostic
  • compatible with DRB III for older Chrysler
  • online programming is available if pay for online subscription
  • Allow internet connection


The Bad:
  • Need a laptop
  • The software is challenging to install (refer to installation video)
  • No update available
  • Some failed to set up DRB3 on this